Friday, December 30, 2011

New Year's Eve Manis

Hi everyone!  I've had a whirlwind week traveling for the holidays, but I am finally done traveling!  I am spending New Year's Eve at home and I'm very excited to not travel. :)  I prepared a couple New Year's Eve manicures and I couldn't decide which one I liked better so I thought I would share both with you guys.

This one is pretty simple.  It's 2 coats of Sinful Colors Snow Me White with 1 coat of Color Club Wish Upon A Rock Star layered over it.  I always imagine New Year's Eve being full of confetti and lots of glitter, so for some reason this manicure seemed like a good fit.

Photo taken in artificial light.


This next manicure started with 2 layers of Sinful Colors Black on Black.  Then, I added 1 coat of Sally Hansen In the Spotlight, which is full of holographic bar glitter.  Finally, I added 1 coat of NYC Silver Starry Glitter, which consists of holographic glitter mixed with light blue and pink hex glitter.  This mani reminded me of confetti falling in a sparkly night sky.

Photo taken with flash.

What are you doing for New Year's Eve?  Do you have a specific manicure you plan to wear?  Thanks for reading! :)

Wednesday, December 28, 2011

Color Club Fame and Fortune

Hi everyone!  I meant to post these earlier but things were pretty busy around here and I didn't get a chance.  This ended up being my Christmas manicure.  I wore Color Club Fame and Fortune from the Backstage Pass collection.  Fame and Fortune has shards of holographic material suspended in a deep, ruby red base.  The base is sheer, so I layered it over OPI Kennebunk-port.  The formula on this polish was surprisingly good and easy to apply.  My only complaint is that the shards of holographic had a tendency to clump up, especially the big pieces, so I had to spread them out with the brush.

I knew I would need to wear this mani for at least 4 days, and since chipped nail polish is my mortal enemy, I needed to make sure it lasted.  This is 1 coat of base coat, 1 coat of Kennebunk-port, 1 coat of Fame and Fortune, 2 coats of Nailene Acrylic Strong top coat, and 1 coat of quick dry top coat.  Phew!  Lots of layers, but there was minimal bubbling and the mani lasted 5 days without chipping.  Sorry about my ragged cuticles. :(

Photo taken in artificial light.


Photo taken in artificial light.

Thanks for reading and have a great week!  :)

Friday, December 23, 2011

Sally Hansen Glass Slipper & Wedding Crasher

I was at my local drug store the other day and noticed the new Sally Hansen Diamond Strength collection was out.  The display was completely full!  Look at all those pretty polishes!  Sally Hansen has also changed their Diamond Strength bottles, so now they have facets on the sides like gemstones.


I purchased Glass Slipper and Wedding Crasher.

Glass slipper has white flakies suspended in a clear base.  Unlike other flakies, these do not shift color.  They are plain white.  Application was easy and Glass Slipper is densely packed.  I only needed 1 coat for good coverage and dry time was fast.

This is 2 coats of Color Club Artsy Crafty with 1 coat of Glass Slipper layered over.  I finished with a coat of quick dry top coat.

Photo taken in natural light.


Photo taken in natural light.


Wedding Crasher has small magenta and light pink hexagonal glitter suspended in a raspberry base.  It's pretty sheer and I needed 3 coats for opacity.  Application was easy though, and dry time was fast.  I finished with one coat of quick dry top coat.

Photo taken in artificial light.


Photo taken in artificial light.

Have you seen any of the new Diamond Strength polishes?  Did you buy any?  If so, which ones?

Thanks for reading! :)

Thursday, December 22, 2011

Sinful Colors Let Me Go + Let's Talk

Today I want to show you a combination I like: Sinful Colors Let Me Go layered over Sinful Colors Let's Talk.

Let's Talk is a blue-based, purple shimmer.  Let Me Go is an iridescent color.  In the bottle it shifts between purple, blue, green, and pink.  On the nail it basically looks pink with a green flash.  When I saw it in the store I thought it looked amazing and had to have it, but after I tried it I was pretty disappointed.  It's very sheer and is never truly opaque, so alas, this one is best for layering.

Here it is layered over the purple shimmer, and I really like it.  This is 1 coat of base coat, 2 coats of Let's Talk, and 1 coat of Let Me Go.

Photo taken in artificial light.

Photo taken in artificial light.

I also wanted to share a little Christmas nail art experiment.

Photo taken in sunlight.

My index and middle fingers are 2 coats of OPI Kennebunk-port, and I added free-hand red tips using LA Colors Art Deco in Red Glitter.  I finished with 1 coat of quick dry top coat.

My ring finger started with 2 coats of Sinful Colors Snow Me White.  Once that was mostly dry, I drew the leaves with Sinful Colors Nail Art in Simple But Fun (it's a really bright, almost neon green).  Then, using a bobby pin, I added the berries using Kennebunk-port.  After they were mostly dry, I used LA Colors Art Deco in Green Glitter to draw the stems, and the Red Glitter to accent the berries.  Finally, I used Sally Hansen Glass Slipper to add some flakies around the edges of the white, and finished with a coat of quick dry top coat.  (I'll have another post soon about Glass Slipper).

Happy first day of winter and thanks for reading! :)

Tuesday, December 20, 2011

Claire's Mini Holographics and Crackles

As promised, I have swatches of the Claire's holographic and crackle set I purchased awhile back.  The set is 5 polishes: 3 holographic polishes in blue, green, & pink and 2 crackles in silver & black.

Let's start with the crackles.  I was pleasantly surprised at the quality of these crackles.  The black was very opaque, and had nice big cracks when applied thick, and smaller cracks when applied thin.  You can see on my pinky I applied a thin layer and there are several small cracks, whereas on my index and middle fingers the crackle is much thicker and has wider cracks.  To be honest, I like the crackle effect better than OPI's Black Shatter.  For some reason Black Shatter only cracks in like 3 places and the color underneath is barely visible.  With this Claire's crackle there are lots of cracks.  Here's black crackle swatched over Sinful Colors Snow Me White and INM Northern Lights Holographic Top Coat.

Photo taken in natural light.


The silver shatter was also pretty good.  It was slightly sheer so I needed to apply thicker coats so the silver was noticeable.  Here's silver crackle swatched over Sinful Colors Snow Me White and INM Northern Lights Holographic Top Coat.

Photo taken in natural light.

Now for the holographics.  Each of these has small holographic hexagonal glitter and square microglitter suspended in a colored jelly base.


They were all very sheer and needed at least 3 coats for opacity.  I applied 1, 2, and 3 coats so you could see how sheer they are.  Each photo is only the Claire's holographic polish, with no base or top coat.

Blue:
Photo taken in natural light.

Green:
Photo taken in natural light.

 Pink:
Photo taken in artificial light.

I think these polishes are best suited for layering since they are chunky and so sheer.  They weren't the easiest to apply, but they are super pretty so I don't mind.

That's all for now.  Thanks for looking! :)

Monday, December 19, 2011

NOTD: Christmas Inspiration

Today I'm wearing a Christmas inspired manicure.  We have gold ornaments on our tree and this time of year I always see the prettiest ornaments.  They're decorated with glitter and intricate designs.  So, I decided to try a fun mani that looks like a Christmas tree ornament.

 I started with 2 coats of strengthening base coat (I have ridges in my nails and they're super noticeable with metallic polishes, so that's why I used 2 coats.  You could also use ridge filler if needed.)  Then, I applied 2 coats of Sally Hansen Complete Salon Manicure in Gilty Pleasure.  Next, I applied 1 coat of Essie Matte About You, a matte top coat.  Finally, I drew swirl/spiral designs with Kiss Nail Art Paint in Gold Glitter.


Photo taken in artificial light.
 

Photo taken in artificial light.


This look was pretty easy to make and it's fun, but subtle.  Thanks for looking!! :)

Sunday, December 18, 2011

Sinful Colors Let's Talk

Hello everyone!  Today I want to show you Sinful Colors Let's Talk, a pretty blue-based purple shimmer.  I got this awhile back and just finally got around to posting pictures of it.  I really like Sinful Colors' shimmer and glitter polishes.  They're only $1.99 at the drugstore and they have a huge selection of colors.  I can't stand their cremes though, they're impossible to apply and always end up in a streaky, clumpy mess.  Let's Talk was pretty easy to apply and I needed 2 coats.  This polish was impossible to photograph, so please don't mind that my skin looks orange in the photos.  I had to mess with the settings on my camera to capture an accurate representation of the polish.

This is 1 coat of hydrating base coat (Essie Feed Me) and 2 coats of Let's Talk.

Photo taken in artificial light.

Photo taken in artificial light.

Photo taken in artificial light.

That's everything for now.  Thanks for looking! :)

Friday, December 16, 2011

Claire's Glam

Hi everyone!  Today I want to show you a new color I picked up recently.  It's from Claire's and it's called Glam.  It has blue and green microglitter suspended in a clear jelly base.  It's hard to distinguish the separate pieces of glitter and just looks like a really vibrant, sparkly teal.  This polish is so pretty!  The camera didn't capture how vibrant and sparkly it is, unfortunately.  It's pretty sheer, and I needed 3 coats for opacity.  It applied relatively easy, but after 2 coats it started to get goopy and thick on my nails.  It dried super fast, which is a huge plus, especially after 3 coats!  I only needed 1 coat of top coat to smooth everything out.  Wear time was not so great.  It started chipping off in huge sheets after 2 days.  For some reason all jellies do this on me.  Does this happen to you with jellies too?

This is 3 coats of Glam and 1 coat of quick dry top coat.

Photo taken in artificial light.


Photo taken in artificial light.


Photo taken in artificial light.

Thanks for looking!! :)  And happy Friday!

Wednesday, December 14, 2011

Wet n Wild Blue Wants to Be a Millionaire

Well, I turned in my last assignment on Sunday, so my semester is officially over!  Grades probably won't be posted for a few days, but I get to have some time off, finally!  And of course that means I will be playing with my pretties and posting much more often.  :)

I feel like I have so much to share today.  I've been seeing photos of the new Color Club holiday collection called Beyond the Mistletoe.  If you haven't seen it yet, it's full of gorgeous holographic glitters.  As soon as I saw photos I decided I needed it ASAP and went on the hunt.  Unfortunately, I haven't been able to find it anywhere (except online), so while I was at the mall I found a collection of Claire's minis that look somewhat similar.  I decided to get them to hold me over until I find the real deal. :D  I'm going to swatch them and post pics soon.  Here are a couple photos of the collection:


The silver and black are crackle polishes.  I really only bought it for the holographic polishes.

Also, while I was hunting around for the new Color Club collection, I stumbled across a huge lemming (lemming: a polish you want really, really bad but don't have yet), OPI DS Extravagance.  I've been wanting this polish for at least a year and just couldn't find it.  I was so disappointed and actually started giving up hope on it.  Well, I found it and got so excited I actually gasped out loud and said, "Oh my god!"  Another customer actually came over all excited, asking, "What? What?"  LOL  Anyway, I grabbed the bottle to take a closer look, I was so excited to have found it finally... and... meh.  Not impressed.  I had seen so many gorgeous photos of it and knew I would just love it, but in person it's so... blah.  The holographic finish seemed so subtle and boring.  Maybe OPI changed their formula or something.  All I know is that I was not impressed.  So the other lady purchased it for her granddaughter.  At least someone will enjoy it. :)  Has that ever happened to you and a lemming?

Alright, time for pictures!  Today I want to show you Wet n Wild Blue Wants to Be a Millionaire from the FastDry collection.  I have no idea why it took me so long to discover this one, considering it's been around for months.  It's a dusty blue jelly infused with loads of holographic micro glitter.  The formula is great and I needed 3 coats for opacity, although you can still see the visible nail line (VNL) just a bit.  It dried super fast with a slightly rough finish.  You'll definitely need top coat over this one if you don't like the rough glitter texture.  I wore this one for about 3 days before removing it, and it didn't chip at all.  I only paid $1.99 and it's so pretty... what a good deal!

I wore 3 coats of Blue Wants to Be a Millionaire, and 1 coat of quick dry top coat.

Photo taken in artificial light.

Photo taken in artificial light.

Photo taken in artificial light.

That's all for today.  Thanks for looking! :)

Thursday, December 1, 2011

Sinful Colors Pearl Harbor

Hi everyone!  Today I want to show you Sinful Colors Pearl Harbor, which I am just now finding out has been discontinued (?!).  I have never seen this polish before anywhere, and this weekend I saw a huge display with tons of them.  Weird right?

Pearl Harbor has glitter that shifts between green-blue-gold that is suspended in a milky white jelly base.  Application was easy and the glitter is densely packed enough that I only needed 2 coats for lots of shimmer.  I've been on a winter-themed kick lately so I decided to layer this over white for a fun winter look.  I think this could make a fun New Year's mani too!  Even though the glitter is blue and green, I think you could layer it over many colors like black, all shades of blue and green, and maybe even dark purple or red for a noticeable contrast.  My one gripe is that the base doesn't dry clear, it actually dries with a slightly yellow tint.  My perfectly snow white mani is now more of a cream color, so be aware that if you want a perfectly white mani avoid using this polish over it.

This is 3 coats of Sinful Colors Snow Me White, 2 coats of Pearl Harbor, and 1 coat of quick dry top coat.  One good thing about Pearl Harbor is that it doesn't eat top coat like other glitters so I only needed 1 coat of top coat.  Yay!


Photo taken in artificial light.

Photo taken in indirect sunlight.


Photo taken in indirect sunlight.


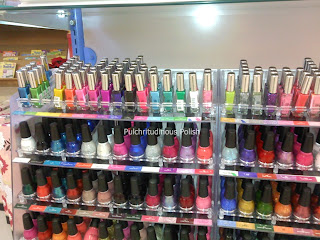
I had one more thing I wanted to show everyone.  Apparently Sinful Colors has a line of nail art polishes now.  I haven't updated my stash in a long time so this weekend I was surprised to see these at the drug store.  I have no idea how long they've been available, but just in case anyone didn't know I wanted to mention it.  I snapped a couple pics with my phone so I could show you.  Not surprisingly, they have a huge selection of colors.  It took a lot of self-control for me to not buy all of these. :)


That's all for today.  Thanks for reading! :)