Hello hello! As promised in my last post, I have a brighter spring manicure for you today (e.g. pastel colors). Aaah pastel colors. I've noticed I don't post about them very much. I have a tendency to gravitate toward bright colors as soon as spring starts, and often the spring-appropriate pastels get ignored. In fact, I only have about 6 pastel nail polishes in my collection and I used most of them on this one manicure!
Alright, on to the pictures!
 |
| Natural light. |
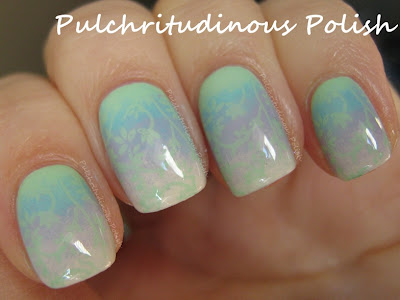 |
| Natural light. |
For this manicure I used:
Sally Hansen Mint Sorbet (base color and stamping color)
OPI What's With the Cattitude? (light blue)
Essie Nice is Nice (lavender)
Sinful Colors Easy Going (light pink)
Shany Plate SH21 (SH18 has a dupe of the same floral print, FYI.)
I started by painting my nails with one coat of Mint Sorbet, letting it dry fully. Then I used a small piece of cosmetic sponge and dipped it into What's With the Cattitude? I lightly dabbed on the nail polish, creating a faded stripe about a quarter inch above the cuticle line. This is the start of the gradient. Next, I used a fresh piece of sponge, and dabbed on Nice is Nice, slightly overlapping it on the blue and creating another faded lavender stripe. Finally, using the same technique, I applied Easy Going to the tips of my nails.
Note: I tried to use the easier gradient method where you literally brush polish right onto the sponge in your desired pattern and then apply it to the nail, but these pastels are just too sheer to show up on the green background. Due to the sheerness of these polishes, I had to apply the colors individually and went over each nail twice to build up the opacity of the colors. It would have definitely been easier with more opaque polishes, but I was already committed at that point, so I just made it work. :)
After the gradient dried, I used Shany Plate SH21 and Mint Sorbet to stamp the design. I finished the manicure with a coat of top coat.
Thanks for reading! Hope you enjoyed! :)


